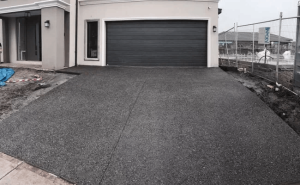
Are you someone who loves to do DIY makeovers for your homes and wants to give it a better look? Then you have landed on the right page on the internet. Apart from the various ways to give a makeover to your lovely homes, adding tiles can be a way to enhance the style and functionality of your patio, deck, or garden in Melbourne. It might seem like a task at first, but with the right tools and techniques, you can achieve professional-looking results. In this blog post, we’ll share some tips and tricks that will help you kickstart your tile installation project.
Selecting the Perfect Outdoor Tiles
Before diving into your tile installation project, it’s crucial to choose the type of tiles for your specific needs. You have a variety of options to consider, such as ceramic, porcelain, natural stone (like travertine or slate), or even rubber tiles. Each material has its characteristics and suitability for different outdoor environments.
Ceramic and porcelain tiles are often favoured due to their durability and versatility. They are resistant to moisture and can withstand weather conditions. Natural stone tiles bring a touch to any space but may require more maintenance. Rubber tiles, on the other hand, offer slip resistance, which makes them ideal for patios and decks. Additionally, porcelain tiles in Melbourne are sturdy, inexpensive, and provide an aesthetic look for your heavenly abode.
Preparing Surface Before Installation
Before you begin laying the tiles, it’s important to prepare the surface. Make sure the area is clean, dry, and free from any debris. Remove any damaged tiles. Use a pressure washer or a stiff brush to get rid of dirt and grime.
Suppose you’re installing tiles on a surface. check for cracks or unevenness. Fill in any gaps with a filler. Make sure the surface is level. For decks, ensure that the boards are in condition and securely fastened.
Plan for Starting Tile Installation
Planning is crucial for successful tile installation. Measure the area where you want to install the tiles and calculate how many you’ll need. It’s wise to order some tiles to account for any breakages or mistakes.
Consider the direction of the tiles. Choose a layout that complements your space. There are patterns to choose from, such as straight, diagonal, or herringbone. Before installing them, lay out the tiles on the ground to get an idea of how they will look.
Choose a Compatible Adhesive
Once you’ve prepared the surface and planned your layout, apply the adhesive.
To ensure effective tile installation, it’s important to use a tile adhesive that is compatible with both your chosen tiles and the surface you’re working on.
Carefully follow the instructions provided by the manufacturer for preparing and applying the adhesive. Use a top-notch trowel to spread the adhesive across the surface, ensuring coverage. It’s advisable to work in sections to prevent the adhesive from drying before you lay down the tiles.
Consider Effective Laying Down
Now comes the enjoyable part which is laying down the tiles! Begin from one corner of your designated area. Gradually work your way outward. Gently press each tile into the adhesive, ensuring a level and even surface. To firmly secure them, you can use a rubber mallet or a wooden block to tap them into place.
Maintain spacing and alignment by using tile spacers between each tile. Make adjustments as you progress to achieve a layout or desired pattern. Be mindful of any obstacles, like columns or flower beds that may require cutouts. When making cuts, utilise a saw or tile cutter while wearing protective goggles and gloves for safety.
Grouting the Joints
Once all tiles have been installed and the adhesive has fully dried, it’s time to proceed with grouting the joints. Select a colour that complements your tiles and mix it according to the manufacturer’s instructions.
Begin by using a rubber float to apply the grout, making sure to press it into the joints. To achieve a surface, use a sponge to remove any excess grout. Allow the grout to dry for the recommended duration, which is usually 24 to 48 hours. Once the grout has dried completely, it’s time to protect your tiles from stains and weather damage by applying a tile sealer.
Consider Effective Cleaning of Tile
Now that you’ve successfully installed your tiles and transformed your space, it’s crucial to maintain them properly for long-lasting beauty. Regularly hose off any dirt or debris on the surface of your tiles. Avoid using cleaners or tools that may cause scratches.
To retain their charm and shield them from elements, make sure you periodically seal your tiles. Additionally, be vigilant in checking for any cracks or loose tiles. Repair them promptly to prevent harm.
Conclusion
In conclusion, undertaking a tile installation can be a DIY project that brings joy and value to your home. By selecting the tiles, adequately preparing the surface, planning meticulously for layout, and following installation techniques – you’ll create an exquisite outdoor oasis! So, gather your tools and get ready to transform the look of your homes in Melbourne.